
What Are The Different Types Of Roof in Singapore?
June 9, 2021
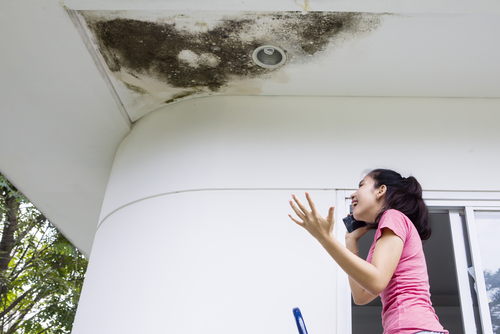
What Happens If You Leave a Leaking Roof?
August 21, 2021How Can I Repair A Leaking Roof?

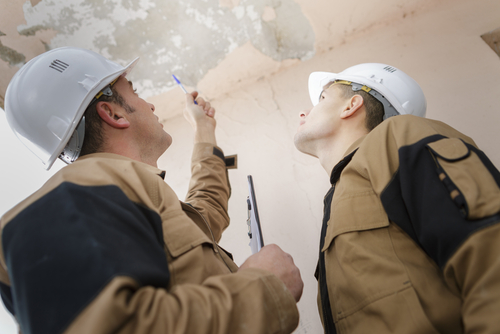
How Can I Repair A Leaking Roof? A leaking roof would be a leading issue that can result in a series of fast cascading home interior problems, from waterlogged insulation of the attic to ruining the floors. To repair a leaking roof is very essential to sustain your home. It is very intensive work which needs a lot of labor work.
Doing it yourself can be a little time and money-saving and when done right, it will pay you off well.
How Can I Repair A Leaking Roof?
Find the Source of the Roof Leak
Go all the way up and work from the lowest spot within the leaking roof like a ceiling stain. Access the attic with a flashlight and a ladder. Now follow the roofline up visually. This look can start a few feet above the roofline, along the crest.
Roof vents are one of the most common sources of roof leaks. Turbines, Attic fans, stack pipes, plumbing soil as well as any feature with flashing metal that extends over the roofline are examples of roof vents. Harmed roof decking made of plywood could also be the source of the roof leak.
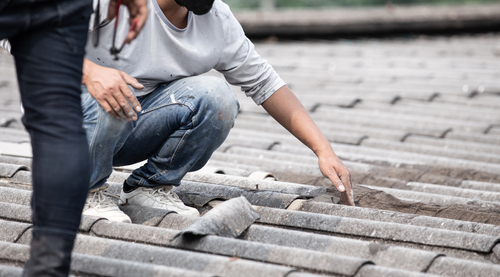
How to Look for Roof Leaks?
If you’re looking for a leak, start by looking uphill from the stains on the roof. Roof penetrations are the first item to look for. The most prevalent source of leaks is items that breach the roof. They could be several feet above, to the right or left of the leak.
A Method for Detecting Difficult Leaks
If you’re having trouble finding a leak, seek the help of a friend and climb up onto the roof with a garden hose. Begin by soaking the area immediately above the point where the leak first occurs in the house. When using the hose, isolated locations. Soak the downhill side of a chimney first, then the sides, and finally the tops of both sides.
Keep your assistant inside the house while you wait for the drip to arrive. Allow the hose to run for several minutes in one spot before moving it a little higher on the roof. Tell your assistant to holler if a drip appears.
Don’t be alarmed if rushing water doesn’t indicate the exact position of the leak. Begin by removing the shingles off the suspected region. There will be proof of the leak once they’ve been deleted, and you’ll be able to track it down to the source.
Look at the Roof Vents
Return to the rooftop and then inspect the roof vent’s condition, where the leak is, and if at all the leak is caused by them. The boots or housings may have fractured. The vents might by themselves have become dislodged. Examine the vents for missing or displaced nails that secure them to the roof.
Remove the roof vent that has been damaged
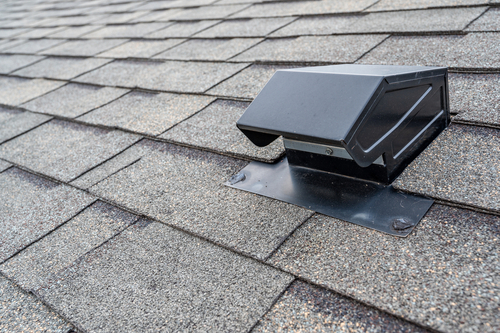
To begin, remove the nails fastening these shingles in link to the vent using the pry bar. Pull aside the shingles that cover the vent’s base with the pry bar. It’s easier if you have someone to hold the shingles for you. The shingles should not be removed. Remove the roof deck nails which are responsible for holding the vent in place. Open the vent at the end.
Roof Vent Replacement
At the base of the vent’s flashing, apply a thick roofing cement layer or outside sealer. When you slide in the vent, have your assistance roll back gently to separate the shingles. Nail the vent in place at all four corners and every four inches. Apply a coat of sealant or cement to the nails.
Remove the old shingles off the roof
To get to the harmed area of the deck of the roof when the leak is caused by the harm done to the deck of the roof, you shall eliminate shingles. As you head bottom-up, the pry bar should be slid beneath the shingles. Begin shingling roughly two rows beyond the repair intended at the spot. Then work your way down the rows, and ripping shingles away as you go.
Roofing Paper That Has Been Removed
The shingles will be separated off the deck of roofing using paper underlayment. Using the utility knife, cut away underlayment or the paper. Keep as much of the original structure as feasible.
Make a mark on the area of the deck cut
On both right and left facets of the damaged portion of a roof deck, draw a chalk line along the roof rafters. Make sure the rope is snapped in the middle of the rafters. To get to the rafter center, use present nails like a guide. Then, both below and above the damaged part, draw a line across or towards 90 deg to the rafters.
Remove the roof deck that has been damaged
Set the saw blade depth to 1/16-inch more as compared to the roofing deck thickness. Slice off the harmed section of the deck of roofing by following the chalk lines. When cutting, ensure to remain off the marked-off area.
The roof deck should be removed
Pull the cut-out nails from the region of the deck of the roof using the pry bar. Then pry off the damaged plywood, but don’t throw it away just yet.
Patch a New Roof Deck
Mark the measurements of the new roof deck repair using the damaged portion of the deck of the roofing as a template. Cut this spot on the ground for safety.
Attach the Patch to the Deck Roof
Set the deck patch roof in its position and secure it to the rafters with the use of common nails of 8d over the roof.
Place a piece of paper or a layer of underlayment on the floor
Nail the paper on the roofing or place underlayment down using roofing nails, beginning at the base and working your way up. Each row should be at least 4 inches apart.
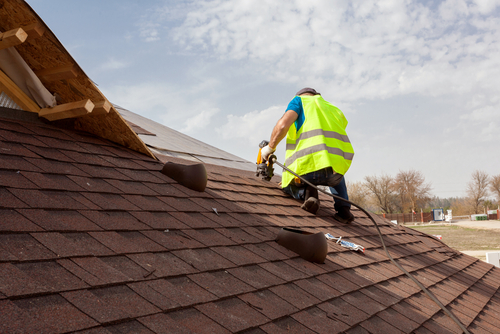
Start with the initial row of Shingles and then work all the way down
Lay the initial row of fresh shingles from the base row up. Towards the left from the right side, leaf the new into the present shingles to sustain the setup rows. Apply roofing cement to the shingles’ bottoms. Nail the shingles down on the way to the top of the shingles with a nail gun.
Finish the Shingles
Head to the shingles till you get to the top row. When new shingles are slid below the top row, the new shingles will mesh with the current shingles.
Conclusion
Repair a leaking roof can be difficult and time-consuming. To prevent leaks, the interlaced components of roofs must exactly coordinate, and the work entails plenty of climbing and carrying. If there are any leaks that you are unable to resolve, you are welcome to seek professional assistance.


